

Temperature Controllable Hot Plate
Operation Methods & Precautions
Product Overview
The intelligent temperature controllable hot plate adopts fuzzy PID control algorithm with dual-screen digital display and auto-tuning function. It features high measurement accuracy and small temperature overshoot. Equipped with single-touch operation, internal and external thermocouple temperature measurement, SCR control output, 160-240V wide voltage power supply and thermocouple break protection. It supports heating and stirring for standard or non-standard reaction flasks ranging from 50ml to 10000ml.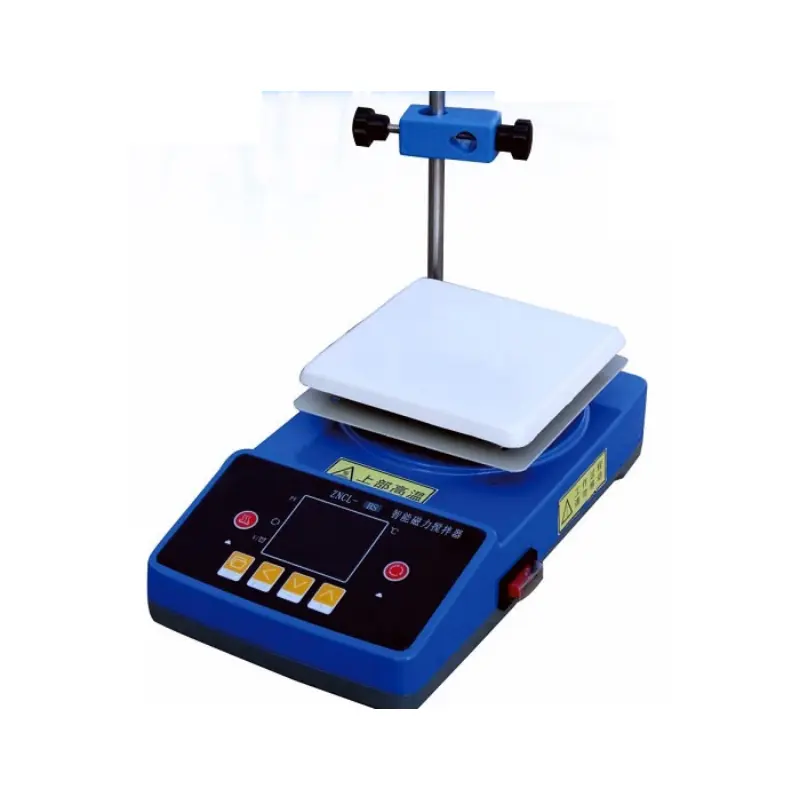
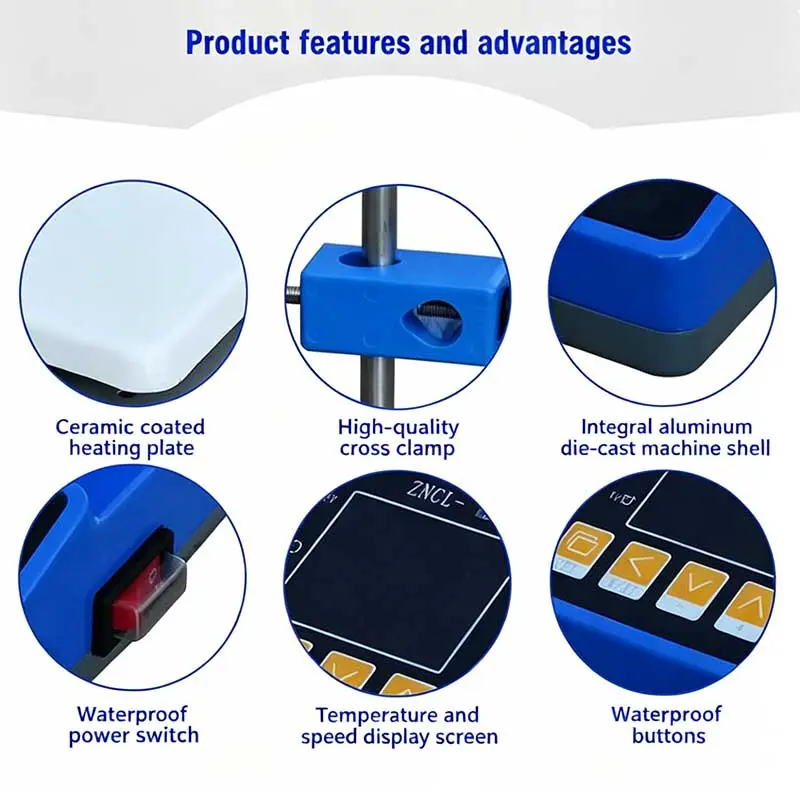
It adopts a DC brushless motor with stable performance, low noise, long service life and no spark generation. The housing is made of one-piece flame-retardant reinforced PBT injection molding, featuring high temperature resistance, corrosion resistance and good insulation performance. The 30° inclined control panel is suitable for both sitting and standing operation. It supports stepless speed regulation with stable low-speed rotation and powerful high-speed stirring.
Operation Methods
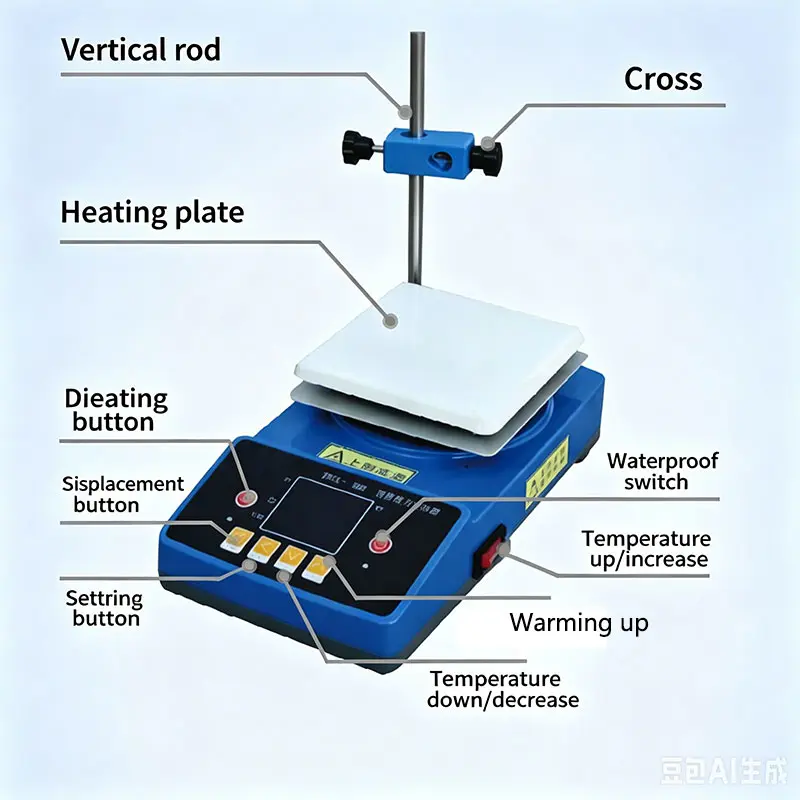
- Fix the support rod into the screw hole at the upper rear of the stirrer, adjust the height of the cross clamp, secure the reaction flask with a universal clamp, place a suitable stirring bar inside the flask, connect to 220V power supply and turn on the power switch.
- Rotate the “Stirring” knob clockwise and adjust to the proper position as required to start stirring.
- For large-volume or high-viscosity solutions, appropriately increase the knob setting to boost stirring power.
- Temperature Setting: Press and hold the ▲ or ▼ key to quickly set the target heating temperature (e.g. 100°C). The green light lights up during heating and turns off when heating stops. The microcomputer adjusts heating power according to the difference between set temperature and real-time temperature to avoid temperature overshoot, maintaining the temperature difference within ±1°C.
- Auto-tuning Function: Auto-tuning minimizes temperature rise time and overshoot for irregular heating power or variable solution volume. Re-run auto-tuning after changing heating medium or heating conditions.
- Start Auto-tuning: Press and hold the shift key for 5 seconds. The numbers on the setting window will flash to indicate auto-tuning mode. The flashing stops after 3 temperature cycles, meaning auto-tuning is completed. Auto-tuning should only be performed at the initial heating stage; mid-process auto-tuning will produce inaccurate results.
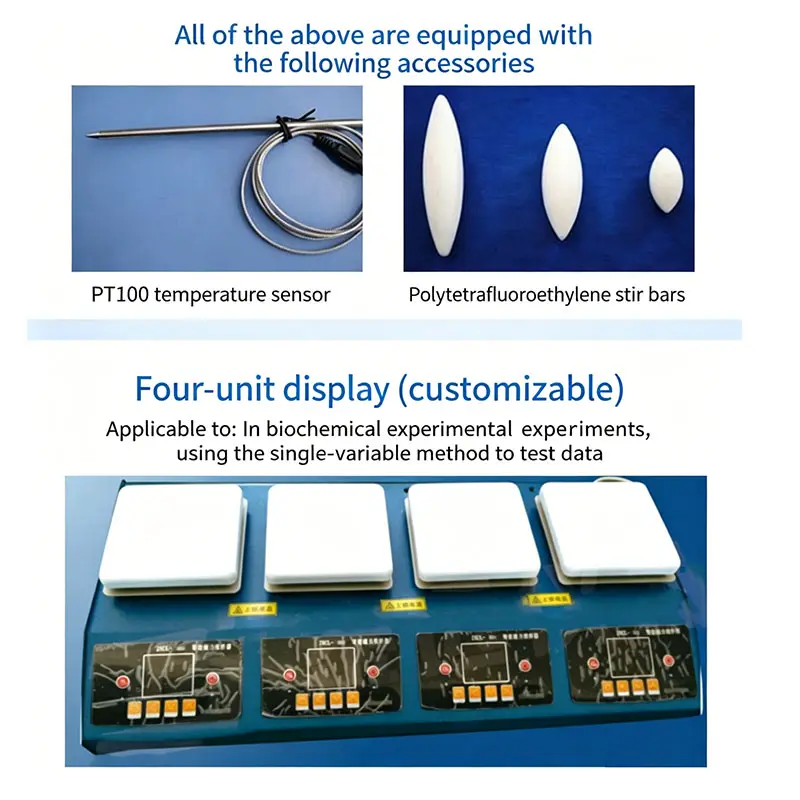
- A rubber plug is located at the lower rear of the stirrer to protect the external thermocouple socket from corrosion and rust. Removing it disconnects the internal probe and stops the machine. When using an external thermocouple, remove and keep the rubber plug, insert the thermocouple plug and tighten the nut, then immerse the stainless steel probe into the solution for temperature-controlled heating.
- Thermocouple Break Protection: If the thermocouple connection is poor, the display shows “hhhh”, the green light turns off and heating stops. Inspect the thermocouple before restarting.
Precautions
- Never operate the unit under dry burning conditions.
- Always connect the ground wire for safe operation.
- The motor is equipped with a cooling fan. During high-temperature experiments, do NOT use the instrument for heating only. Keep the motor rotating at low or medium speed to prevent damage from high-temperature radiation. Contact your distributor for repair if the motor fails to start. Damage caused by improper operation is not covered by warranty.
- After high-temperature heating, turn off heating first, wait several minutes for residual heat dissipation, then stop stirring.
- The heating plate reaches high temperature during operation. Take care to avoid burns.
- If leakage occurs due to wet hands, liquid spillage or long-term high humidity environment, dry the equipment thoroughly before reuse to avoid hazards.
- Store in a dry place free of corrosive gas when not in use for long periods.
- Inductive electricity may transmit to the housing under high relative humidity. Ensure proper grounding and good ventilation.
- Operating relative humidity: 35% – 85% (non-condensing).
- Fuse specification: 5×20 15A.
Technical Specifications
| Control Algorithm | Fuzzy PID, auto-tuning |
| Display | Dual digital screen |
| Motor Type | DC brushless motor, stepless speed regulation |
| Power Input | 160~240V wide voltage |
| Supported Flask Volume | 50ml ~ 10000ml |
| Housing Material | Flame-retardant reinforced PBT |
WeChat
Scan the QR Code with WeChat